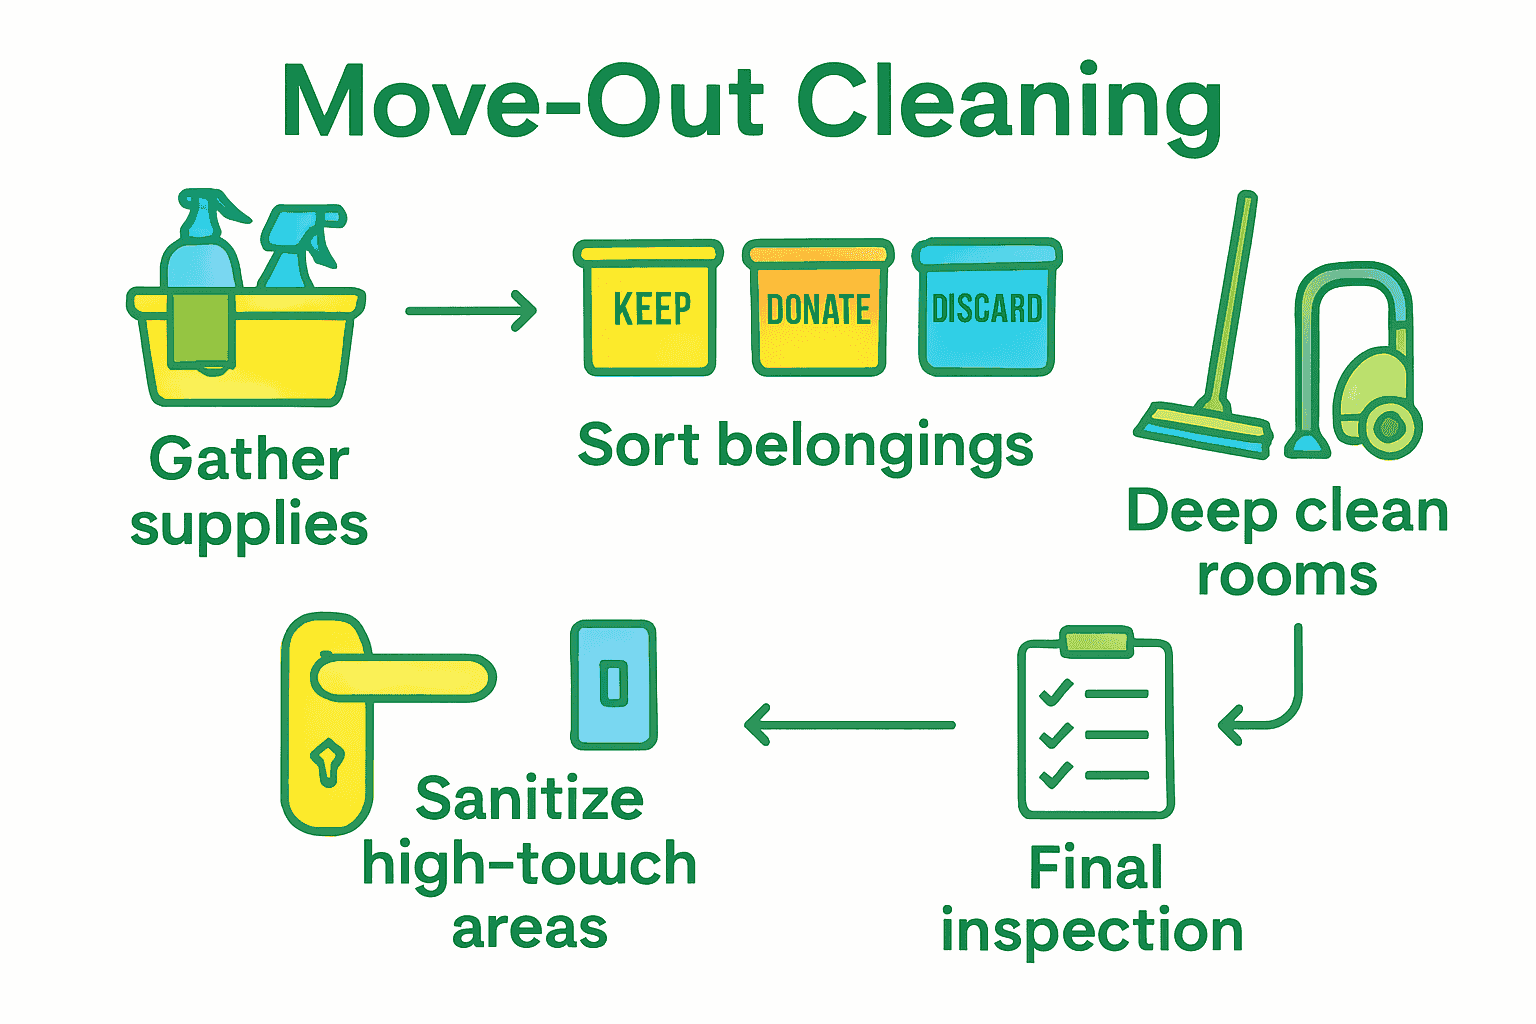
Did you know that nearly 70 percent of tenants lose part of their security deposit due to insufficient cleaning at move-out? Whether you are leaving an apartment or selling your home, a spotless space can make or break that final inspection. With a clutter-free checklist and the right supplies, you can transform cleaning from a stressful chore into a smooth, reliable process that leaves your place looking its absolute best.
Table of Contents
- Step 1: Gather And Organize Essential Cleaning Supplies
- Step 2: Sort And Remove Personal Belongings From All Rooms
- Step 3: Deep Clean Rooms Starting From Top To Bottom
- Step 4: Sanitize High-Touch Surfaces And Forgotten Areas
- Step 5: Inspect Each Room To Ensure Move-Out Cleanliness
Quick Summary
| Key Point | Explanation |
|---|---|
| 1. Assemble essential cleaning supplies | Gather all necessary cleaning items organized in a portable caddy to streamline the cleaning process. |
| 2. Sort belongings into three categories | Create sections for items to keep, donate, or trash to declutter effectively before packing. |
| 3. Clean from top to bottom | Tackle cleaning in each room from high surfaces down to prevent re-soiling areas already cleaned. |
| 4. Sanitize high-touch surfaces thoroughly | Focus on frequently touched areas like doorknobs and switches to maintain health standards. |
| 5. Conduct a final inspection systematically | Use a detailed checklist to ensure all areas are spotless before the final move-out inspection. |
Step 1: Gather and Organize Essential Cleaning Supplies
Before diving into your moving cleaning adventure, you will want to assemble a comprehensive cleaning kit that makes the entire process smooth and efficient. Organizing your supplies strategically will save you time and energy during the cleaning process.
Here’s a summary of essential cleaning supplies and their recommended uses:
| Supply | Primary Use | Recommended Storage |
|---|---|---|
| All-purpose cleaner | General surfaces | Portable caddy |
| Glass cleaner | Mirrors, windows | Spray bottle, upright |
| Disinfectant spray | High-touch surfaces | Separate for bathrooms |
| White vinegar | Natural cleaning, deodorize | Labeled bottle, cool place |
| Microfiber cloths | Dusting, polishing | Color-coded, dry container |
| Paper towels | Absorbing spills | Package or holder |
| Scrub brushes | Tough stains, grout | Hanging or bin |
| Sponges | Surface scrubbing | Dry tray, replaced often |
| Rubber gloves | Hand protection | Kept together, dry area |
| Trash bags | Waste collection | Box or roll, accessible |
| Mop and bucket | Floor cleaning | Closet or laundry area |
| Vacuum cleaner | Carpets, floors | Closet, upright |
According to the CDC, proper organization of cleaning supplies is critical to prevent cross-contamination and ensure thorough cleaning. Your essential cleaning kit should include:
- All-purpose cleaner
- Glass cleaner
- Disinfectant spray
- White vinegar
- Microfiber cloths
- Paper towels
- Scrub brushes
- Sponges
- Rubber gloves
- Trash bags
- Mop and bucket
- Vacuum cleaner
University of Florida recommends using a portable caddy or container to carry your cleaning supplies from room to room. This approach keeps everything organized and reduces the time spent walking back and forth to retrieve items.
Pro tip: Before starting your cleaning, check that all your supplies are fully stocked and in good condition. Nothing slows down a cleaning project more than running out of cleaning solution midway through.
With your supplies gathered and organized, you are now ready to tackle the deep cleaning process room by room. Your systematic approach will ensure no corner is left untouched during this moving preparation.
Step 2: Sort and Remove Personal Belongings from All Rooms
Sorting and removing personal belongings is a critical step in preparing your home for a move. This process will help you streamline your packing and ensure a clean space for the next residents.
Organization International Bureau recommends beginning with a comprehensive inventory and decluttering strategy. Start by creating three primary sorting categories:
- Keep (items you will take with you)
- Donate (items in good condition no longer needed)
- Trash (items damaged or no longer usable)
Move systematically through each room. Open drawers, closets, and cabinets. Remove everything and assess each item individually. Ask yourself: Have I used this in the past year? Does it hold significant sentimental value? Will it fit in my new space?
City of Philadelphia suggests taking before and after photos to track your progress. This can be motivating and help you see how much you have accomplished.
Pro tip: Create a staging area with clearly labeled boxes or containers for each category. This prevents items from getting mixed up and makes the sorting process more efficient.
Once you have sorted through all rooms, immediately remove donation and trash items from your home.
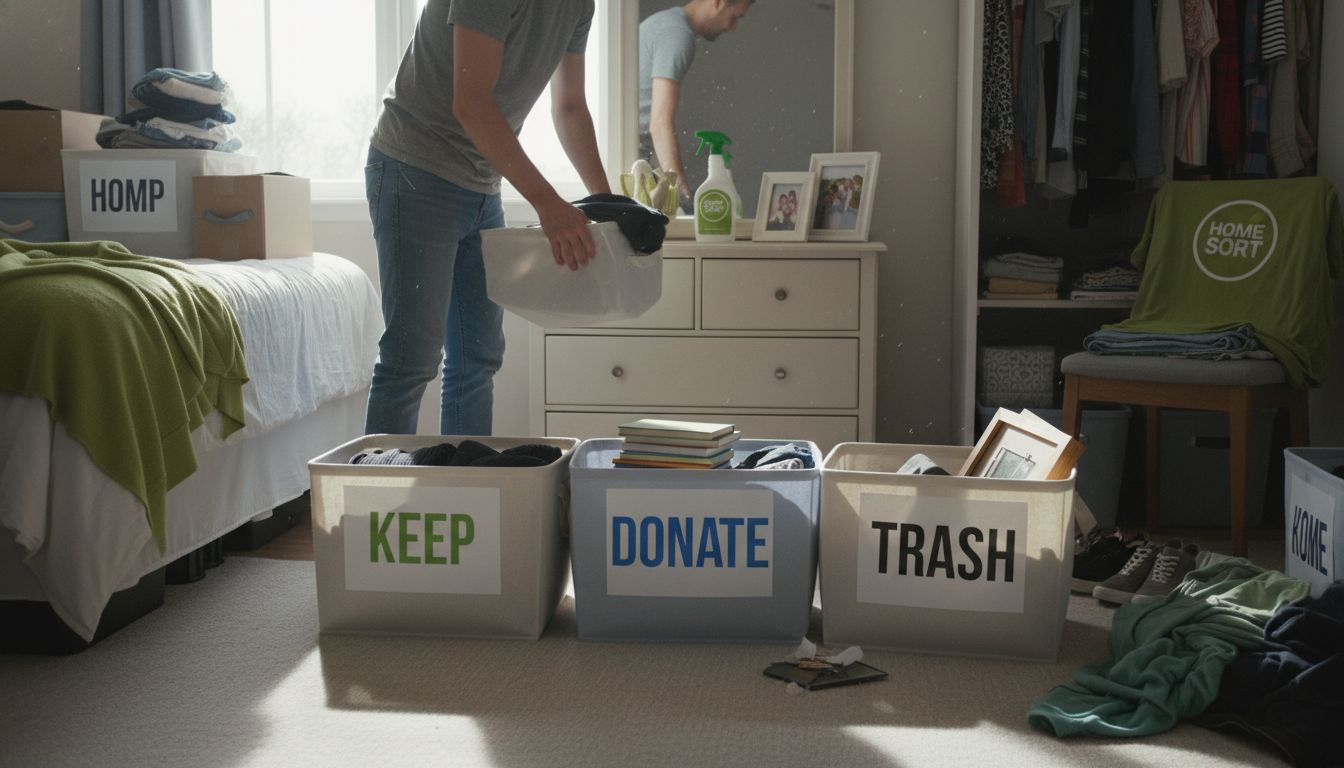 This prevents second guessing and clears physical and mental space for your upcoming move. Your next step will be to carefully pack the items you are keeping.
Step 3: Deep Clean Rooms Starting from Top to Bottom
Deep cleaning your home before moving requires a strategic approach that ensures every surface gets thoroughly cleaned. The goal is to leave your space spotless and ready for the next residents.
American Cleaning Institute recommends a top-to-bottom cleaning method that prevents re-soiling already cleaned areas. Start with high surfaces like ceiling fans, light fixtures, and top shelves before working your way down to floors and baseboards.
Begin each room with these key steps:
- Dust ceiling corners and light fixtures
- Wipe down walls and window frames
- Clean window treatments and blinds
- Dust and clean shelves and upper cabinets
- Sanitize countertops and surfaces
- Clean appliances inside and out
- Scrub sinks and fixtures
- Clean floors last
American Cleaning Institute emphasizes the importance of following cleaning product instructions carefully. Always check labels for proper use, storage, and disposal to ensure effective and safe cleaning.
Pro tip: Use microfiber cloths for dusting and cleaning to trap dirt more effectively and prevent spreading dust around. Color code your cloths to avoid cross-contamination between different areas.
By methodically working from top to bottom in each room, you will create a comprehensive cleaning approach that leaves no surface untouched.
Your next step will involve focusing on specific areas that require extra attention.
Step 4: Sanitize High-Touch Surfaces and Forgotten Areas
Sanitizing high-touch surfaces is crucial when preparing your home for moving. This step ensures a thorough cleaning that goes beyond basic surface wiping and targets areas often overlooked during regular cleaning.
National Center for Healthy Housing emphasizes the importance of comprehensive sanitization to prevent illness transmission. Focus on these frequently touched surfaces:
- Doorknobs and handles
- Light switches
- Remote controls
- Computer keyboards and mice
- Smartphones and tablets
- Refrigerator handles
- Cabinet pulls
- Faucet handles
- Toilet flush mechanisms
- Stair railings
CDC recommends using color-coded cleaning cloths to prevent cross-contamination between different areas. Use separate cloths for bathroom surfaces versus kitchen areas to maintain optimal hygiene standards.
Pro tip: Pay special attention to forgotten areas like baseboards, light switch plates, window tracks, and the tops of door frames. These surfaces accumulate dust and grime but are often missed during routine cleaning.
By meticulously sanitizing these high-touch and often forgotten surfaces, you will ensure a comprehensive clean that goes far beyond surface level. Your next step will involve addressing specific room challenges and preparing for final inspection.
Step 5: Inspect Each Room to Ensure Move-Out Cleanliness
Final room inspection is your last opportunity to catch any missed cleaning spots and ensure your home is perfectly prepared for the next residents. This meticulous walkthrough will help you meet the highest cleaning standards.
American Cleaning Institute recommends developing a systematic inspection plan to cover every area thoroughly. Create a detailed room-by-room checklist that allows you to methodically verify your cleaning results.
Inspection checklist for each room:
- Check ceiling corners for cobwebs
- Examine walls for scuff marks
- Inspect baseboards and trim
- Look behind furniture and appliances
- Verify inside cabinets and drawers are clean
- Check window sills and tracks
- Ensure no fingerprints remain on surfaces
- Confirm floors are free of dust and debris
American Cleaning Institute emphasizes addressing specific cleaning challenges unique to each room. Kitchen and bathroom areas require extra scrutiny due to potential buildup of grime and soap residue.
Pro tip: Use natural lighting or a bright flashlight to reveal hidden dirt and spots you might otherwise miss. Walk slowly and systematically through each room, running your hand along surfaces to feel for any remaining dust or grime.
By conducting a thorough final inspection, you will ensure your home is impeccably clean and ready for the next occupants.
 Your final step will involve preparing for the move-out process and final handover.
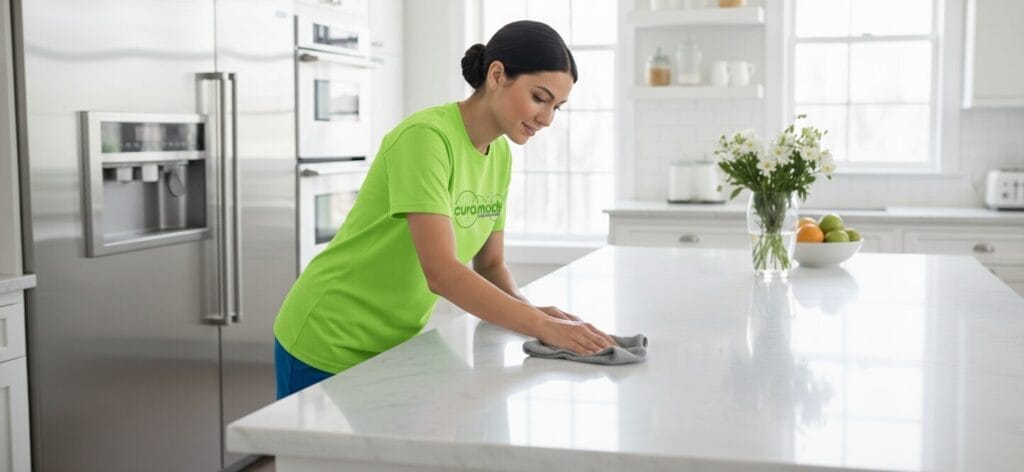
Simplify Your Move-Out Cleaning with Cura Maids
Moving can be overwhelming with all the sorting and deep cleaning required to leave your home spotless. The detailed guide you just read highlights important steps like organizing supplies, thorough sanitation, and final inspections to ensure move-out cleanliness. If this process feels daunting or you lack the time to tackle each step methodically Cura Maids is here to help. We offer expert move-out cleaning services tailored to busy families and professionals throughout the Research Triangle area.
Discover how our trusted team uses an efficient and eco-friendly approach that complements the top-to-bottom cleaning strategy you learned in this guide. From scrubbing forgotten corners to sanitizing high-touch surfaces we focus on the details so you can focus on your new beginning. Visit Cleaning Tips by Room Archives – Cura Maids Cleaning Tips by Room for helpful advice or explore more guidance on maintaining a sparkling home at Cleaning Tips Archives – Cura Maids Cleaning Tips. Get started today by scheduling your professional cleaning at https://curamaids.com and experience the peace of mind that comes from knowing your move-out cleaning is in expert hands.
Frequently Asked Questions
How should I gather and organize cleaning supplies for moving?
Gather all essential cleaning supplies into a portable caddy or container for easy access. Include items like all-purpose cleaner, microfiber cloths, and trash bags to streamline your cleaning process.
What are the best methods for sorting personal belongings before moving?
Sort personal belongings into three categories: Keep, Donate, and Trash. This approach helps simplify packing and ensures you leave your new space ready for the next residents.
How do I deep clean rooms effectively before moving?
Deep clean each room by following a top-to-bottom approach, starting with high surfaces first. Dust ceiling fixtures and shelves, then clean lower surfaces, ensuring each area is thoroughly addressed.
What high-touch surfaces should I sanitize during the move-out cleaning?
Focus on sanitizing frequently touched surfaces, such as doorknobs, light switches, and remote controls. This reduces the risk of germ transmission and ensures a clean environment for the next occupants.
What checklist should I follow for the final room inspection?
Create a detailed inspection checklist to verify all areas are clean, focusing on ceiling corners, walls, and behind furniture. Check for remaining dust or grime to ensure your home is ready for move-out.
How can I ensure I don’t miss any cleaning spots during my final inspection?
Use natural lighting or a bright flashlight as you inspect each room. Move slowly and methodically to reveal hidden dirt and ensure no surface is overlooked.
Recommended
- Living Room Chaos: Your Easy-to-Follow cleaning checklist
- 7 house cleaning tasks best left to professionals
- 10 expert tips for maintain a clean home
- Love Your Home? Show It the Care It Deserves – Cura Maids
- How to Detail a Car for a Showroom Shine at Home
- Why Clean Before Moving In: Essential Guide for McKinney Residents 2025